


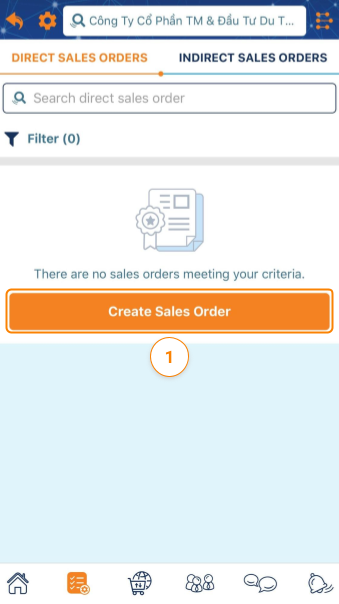
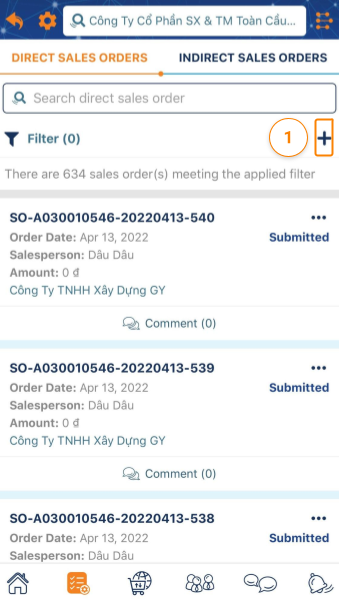
Create a Sales Orders
Step 1 : At the Sales Offers screen
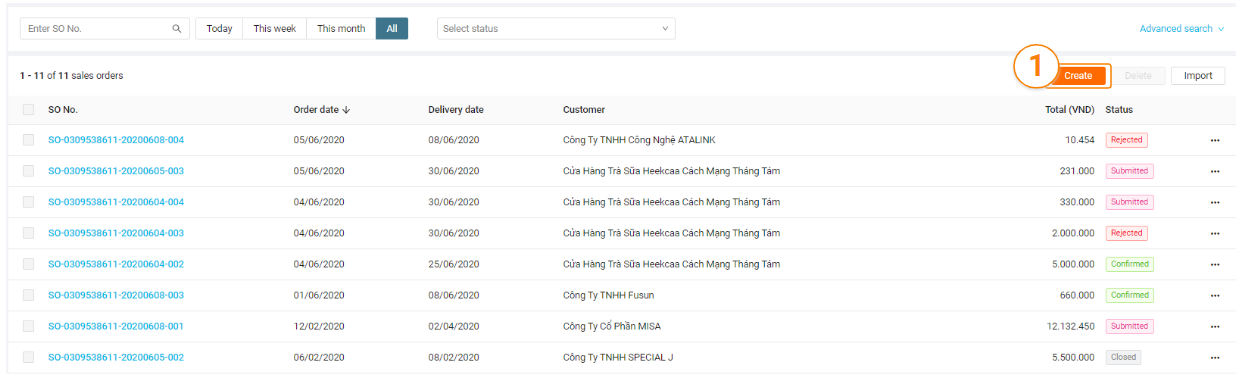
- If there are no Sales Offers being shown, tap on Create Sales Order
- Otherwise, tap on the + at the top right corner of the screen to create a new Sales Offer
Step 2: At the Create Sales Order screen

- General information: Fill in the details of Sales Order name, Order date, Delivery date, Document number, Invoice number, select Salesperson
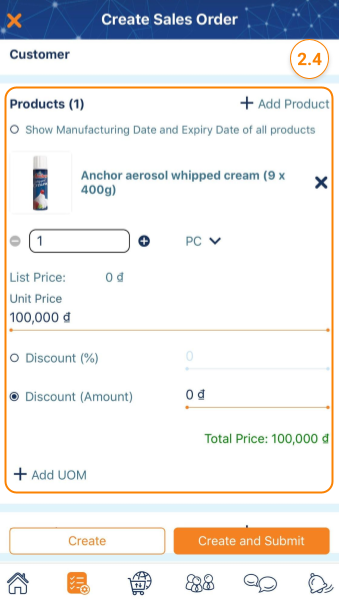
- Customer: choose the customer to send the Sales order
Note: Sales orders will only be sent to the target or customer. Sales orders can only be sent to one customer at the time
- Products: click + Add products to the sales unit. Adjust the exact quantity and unit price of each product, and discount (if any). ATALINK will automatically calculate the product money.

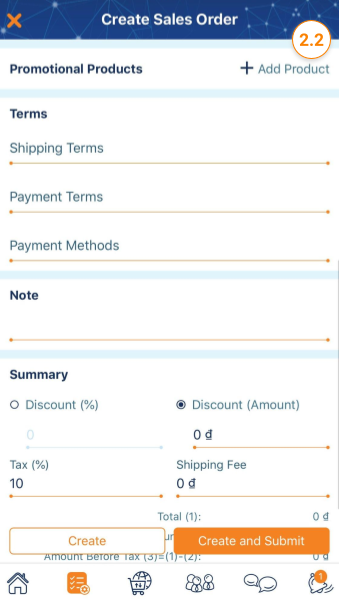
- Promotion products: click + Add product to add promotional products if available
-
Shipping Address: enter your shipping address
- Billing Address: enter the billing address
- Terms: Subject to the agreement and negotiation of both parties. The seller will need to enter the correct information about the appropriate shipping terms , payment terms , and payment methods .
- Note: add notes to increase the detail of the sales order
Step 3:
- Click Create to create a sales order. A newly created sales order will be saved as a draft
- Click Create and Submit to send the sales order to the customer
Step 1: To create a new Sales Order, you Click Create button
Step 2: Please complete the information including:
- Enter SO title
- Status
- Document No
- Currency
- Salesperson
- Order Date
- Delivery date
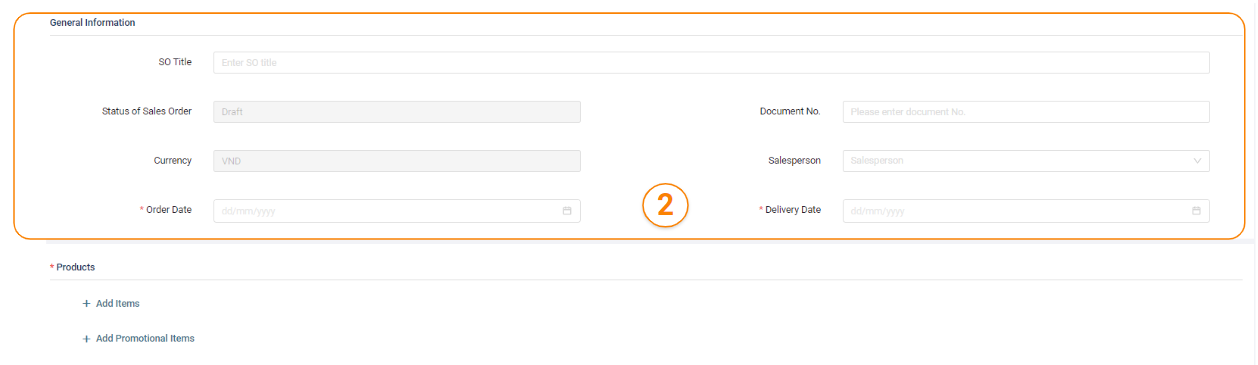
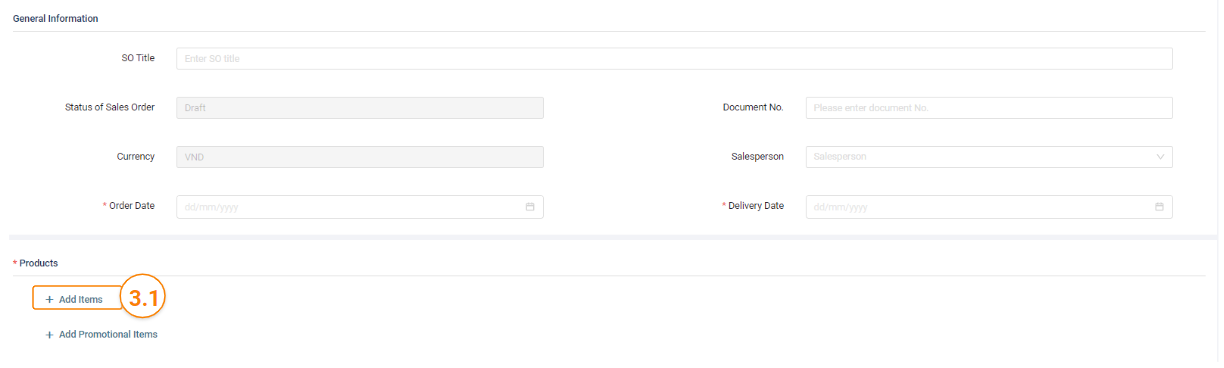
Step 3: Select product
-
Click Add Items to add product
-
Select product by category:
- My product catalog: This list will display the products you have added to my product catalog. You view guidelines for adding products here. There are 2 options to search product:
- Option 1: Enter “Product Name, SKU, …” and Click
 icon to search product that you need to find
 - Option 2: Filter by
- Product Category: Filter by the list of your company product
- Atalink Category: Filter by the list of ATALINK product category (My products are sorted by the standardized catalog of ATALINK)
- Click
 icon to add the product to your cart
 - To remove the product from your cart: Click
 i con at the selected product or
  Icon at that product in your cart
- Click
- Option 1: Enter “Product Name, SKU, …” and Click
- ATALINK Catalog: Search, select product by ATALINK category
- Option 1: Enter “Product Name, SKU, …” and Click icon to search product that you need to find
- Option 2: Filter and select product by ATALINK category
- Click icon to add the product to your cart
- To remove the product from your cart: Click Icon at the selected product or Icon at that product in your cart
- Option 1: Enter “Product Name, SKU, …” and Click
- New product: If you cannot find out the product on ATALINK, please input information about it.
- Enter information
- Product Name
- Quantity
- UOM
- Unit Price
- Remark
- Click Add Another item to add the new product and enter information
- Enter information
- My product catalog: This list will display the products you have added to my product catalog. You view guidelines for adding products here. There are 2 options to search product:
- Click OK button to get to the next step or Click Cancel button to exit the add product screen

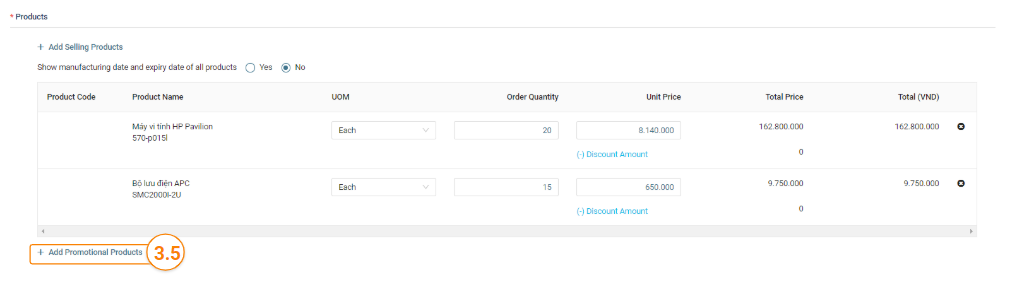
- Select Yes or No to show manufacturing date and expiry date of all product
- Add product detail
- UOM
- Order Quantity
- Unit Price
- Set up discounts for a product
- Click Discount
- Choose percentage discount or the amount of discount
- Enter percentage discount or the amount of discount

- Click Add Promotional Items to add promotional products to customers. How to add products similar to the above but default promotional products are free.
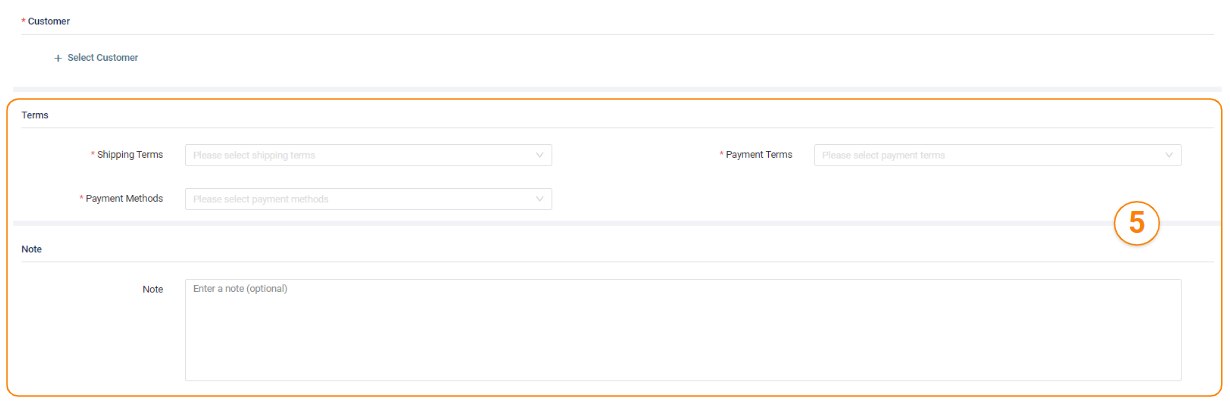
Step 4 : Select customer
- Click Select Customer

- You can select a customer by one of the following options:
- My Customer: This list will display the customers that your company has validated the relationship. You can view the guidelines for adding and validate customers here. There are 2 options to select customer
- Search customer by customer name or tax code
- Filter by the list of your company customer
- All Companies on ATALINK: There are 3 options to select customer
- Search customer by customer name or tax code
- Filter by locations and categories
- Select customer on an entire the list of ATALINK customer
- Click Customer Name to select customer
- Note:
- SO will only sent to Prospects or Customers. You can view the guidelines for Customers Management Feature here.
- SO will only sent to a customer in a SO
- For each company, there will be a default Shipping Address and Payment Address
- My Customer: This list will display the customers that your company has validated the relationship. You can view the guidelines for adding and validate customers here. There are 2 options to select customer

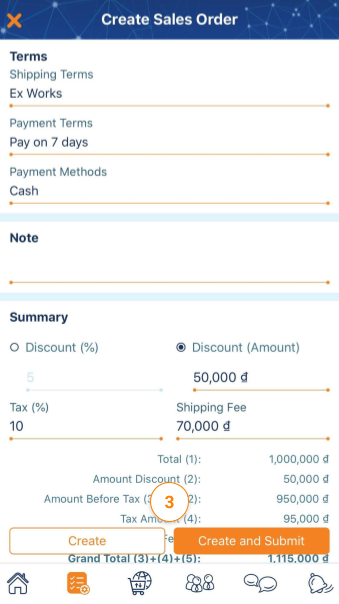
Step 5: Shipping Terms, Payment Terms, and Payment Methods will enter corrected with information your company and vendor negotiated
Note : Enter a note to increase the detail of the SO.
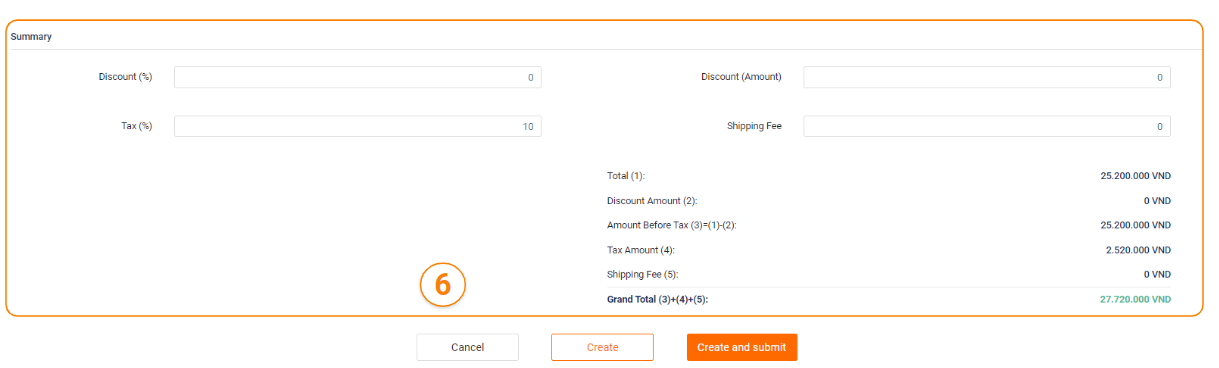
Step 6: Summary
- If the SO have a discount by percentage discount or discount amount, select one of the two options to enter information, the system will automatically calculate the remaining information.
- Tax (%): The system automatically recommends tax of 10%, please enter if there is a change
- Shipping Fee : Enter the shipping fee for the SO exactly
- Grand total : The system automatically calculates grand total, please check Tax, shipping fee, discount and unit price
Step 7:
-
- Click Create button to save the SO with the status Draft
- Click Create and Submit button to save and sent the SO to customers. The SO save with the status Submitted
- Click Cancel to cancel the SO
