


Setting Up Locations Within a Warehouse
Please access the website version to use this feature
When a warehouse is created, the system generates storage locations within that warehouse corresponding to the warehouse code. A warehouse here functions like a warehouse address containing various storage locations within. You can add additional storage locations within that warehouse or rename the storage locations to suit your business needs.
- Setting Up Locations Within a Warehouse
To set up storage locations within a warehouse, simply follow these steps:
Step 1: Select Configuration > then choose Locations to access the list of locations.
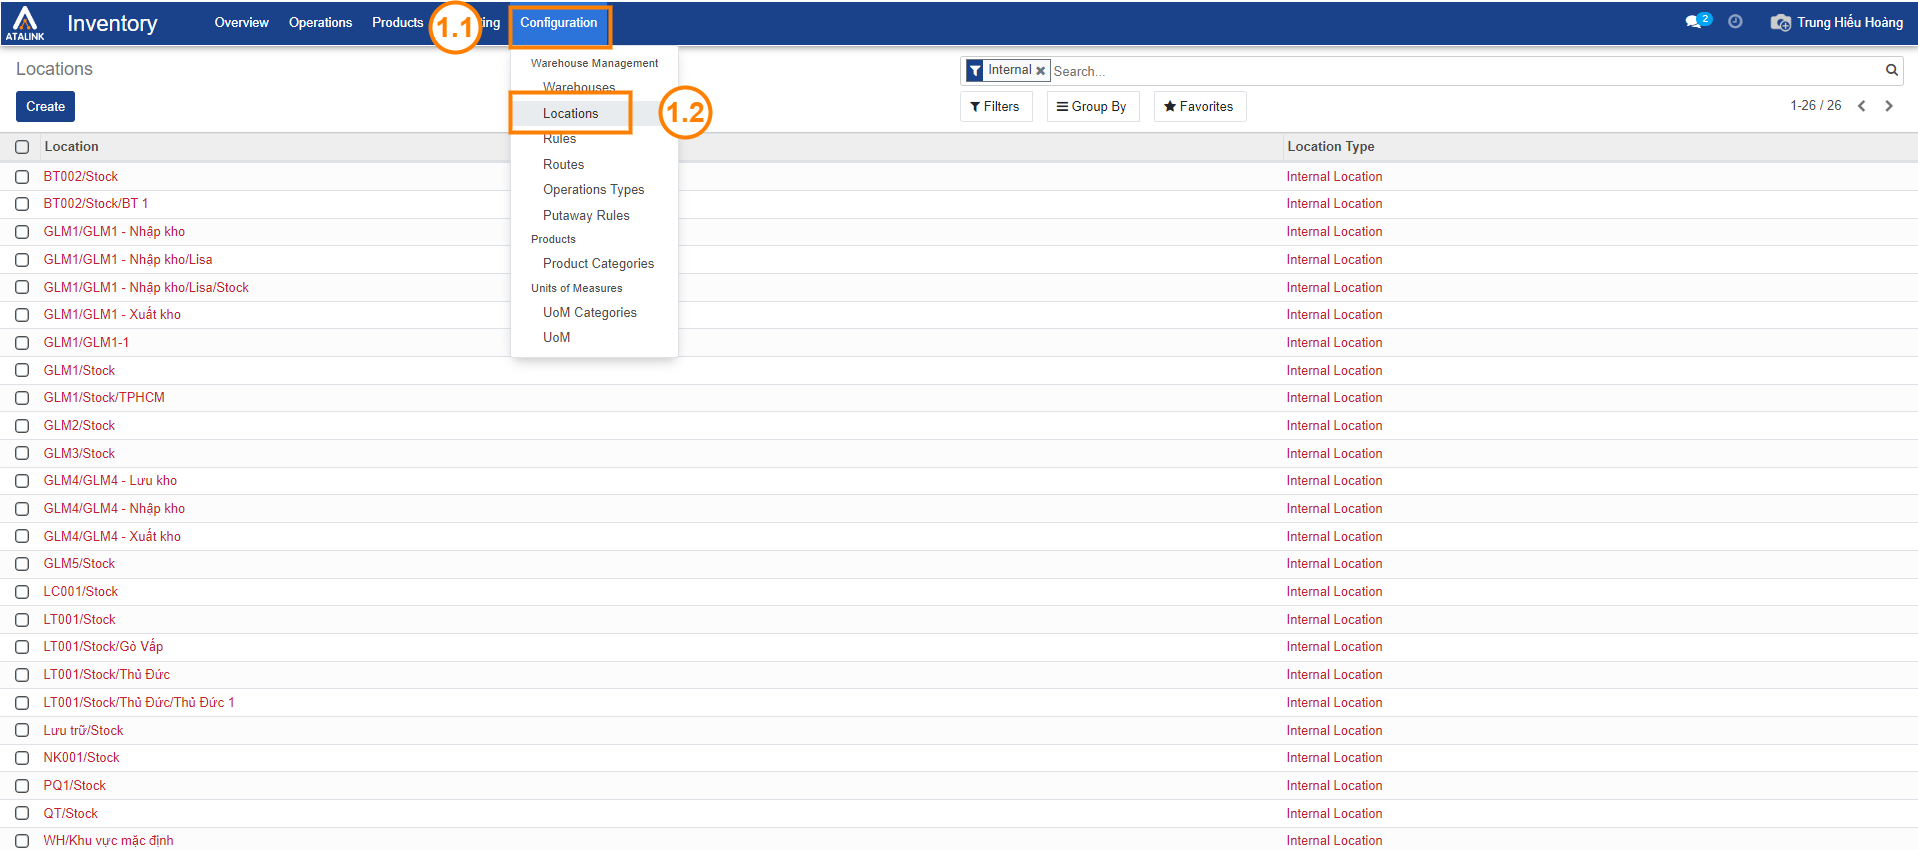
Step 2: Choose Create to create a new location, or select an existing location to edit.
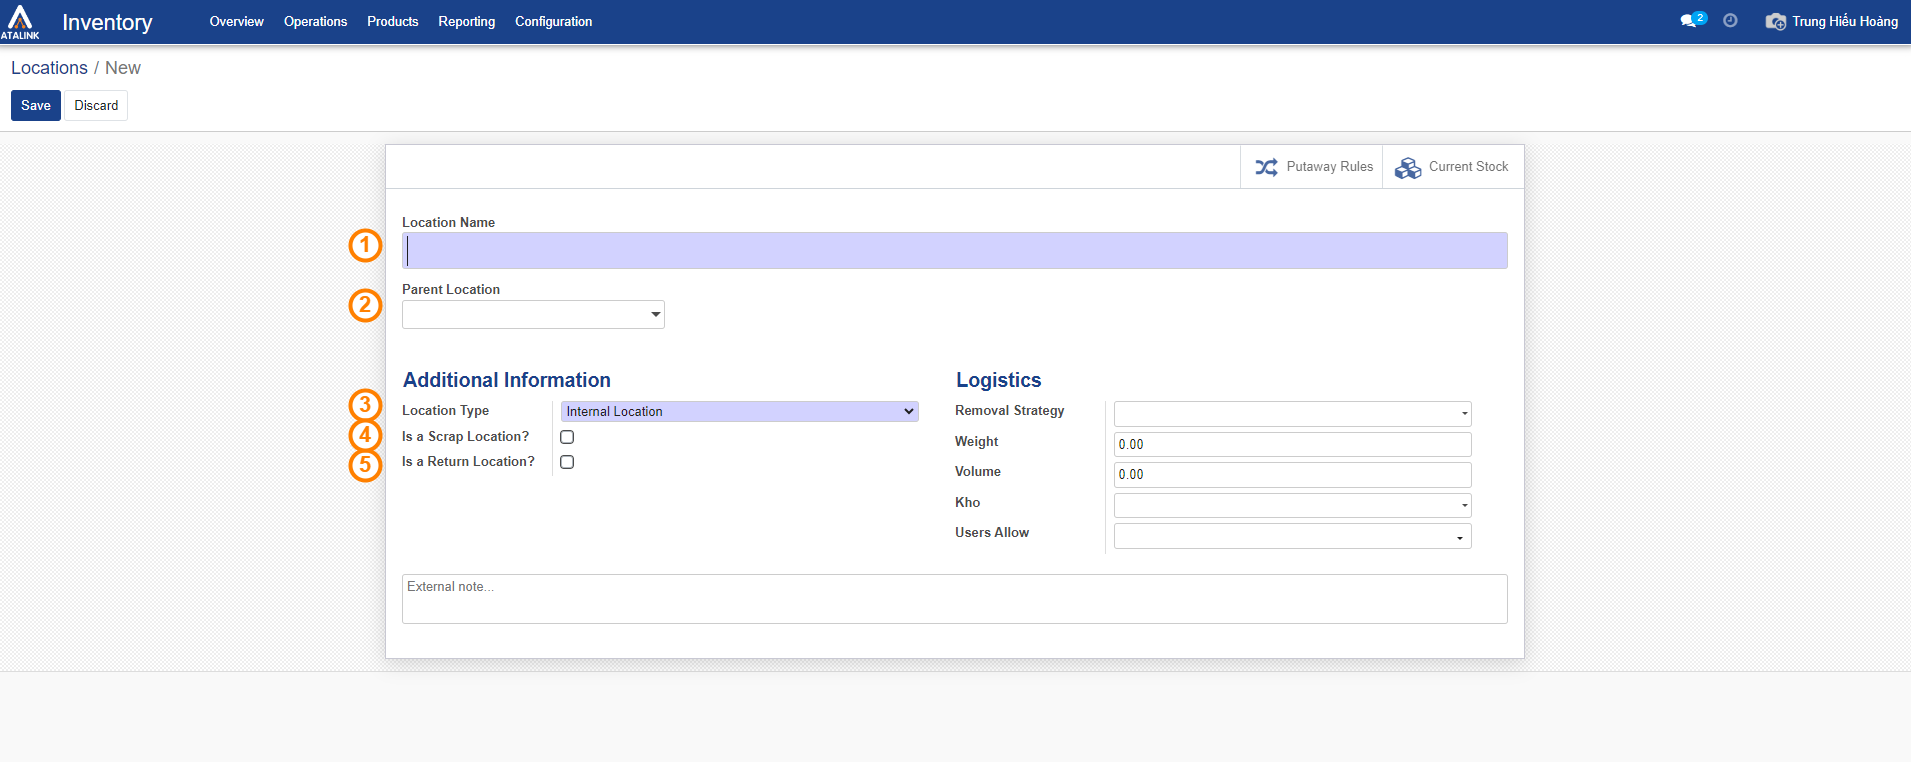
- Location Name: Enter the name of the warehouse location.
- Parent Location: Here you can choose an existing parent location or create a new one.
- Location Type: Choose the appropriate location type. The following types are available:
- Supplier Location: Used as a counterpart for receiving goods from suppliers into the warehouse. For example, from Supplier to Internal Location.
- View Location: Goods cannot be stored in this location. It’s often used to consolidate internal locations. In the given example, if all 3 locations (Reserve, Input, Output) belong to a view location, viewing the total quantity in these 3 locations would only require checking the view location’s quantity, rather than manually summing the quantities of the 3 individual locations.
- Internal Location: Physical locations for storing goods. These locations can have a hierarchical structure, for instance: Reserve Shelf 1 / Compartment 1; Shelf 1 / Compartment 2; Shelf 2 / Compartment 1; Shelf 2 / Compartment 2; etc.
- Customer Location: Used as a counterpart for delivering goods from the warehouse to customers. For example, from Internal Location -> to Customer.
- Scrap/Inventory Location: Used as a counterpart for scrap/audit activities. Lost items during audits generate transfers from Internal Location -> Scrap Location; excess items generate transfers from Scrap Location -> Internal Location.
- Production Location: Used as a counterpart for production activities.
- Transfer Location: Used as a counterpart for inter-warehouse transfers.
- Is a Scrap Location: Check this if the location is used for returning damaged items.
- Is a Return Location: Check this if the location is used for returns.
Step 2: Choose Create to create a new location, or select an existing location to edit.
- Location Name: Enter the name of the warehouse location.
- Parent Location: Here you can choose an existing parent location or create a new one.
- Location Type: Choose the appropriate location type. The following types are available:
- Supplier Location: Used as a counterpart for receiving goods from suppliers into the warehouse. For example, from Supplier to Internal Location.
- View Location: Goods cannot be stored in this location. It’s often used to consolidate internal locations. In the given example, if all 3 locations (Reserve, Input, Output) belong to a view location, viewing the total quantity in these 3 locations would only require checking the view location’s quantity, rather than manually summing the quantities of the 3 individual locations.
- Internal Location: Physical locations for storing goods. These locations can have a hierarchical structure, for instance: Reserve Shelf 1 / Compartment 1; Shelf 1 / Compartment 2; Shelf 2 / Compartment 1; Shelf 2 / Compartment 2; etc.
- Customer Location: Used as a counterpart for delivering goods from the warehouse to customers. For example, from Internal Location -> to Customer.
- Scrap/Inventory Location: Used as a counterpart for scrap/audit activities. Lost items during audits generate transfers from Internal Location -> Scrap Location; excess items generate transfers from Scrap Location -> Internal Location.
- Production Location: Used as a counterpart for production activities.
- Transfer Location: Used as a counterpart for inter-warehouse transfers.
- Is a Scrap Location: Check this if the location is used for returning damaged items.
- Is a Return Location: Check this if the location is used for returns.
Step 3: Click on Save to store the information you’ve entered, or select Discard to cancel the information you’ve created.
- Managing Location Setup within a Warehouse
In the interface for setting up locations within a warehouse, Atalink allows you to perform the following functions:
- Click Create to generate a new location.
- Click Location to interact with the chosen location.
- Click Print to print the barcode for the selected location.
- Click Action to execute actions with the selected locations: Export, Store, Unstore, Delete.
