


Setting for Sales Team
To access this setting , your login account must be assigned to one of the following roles:
- Super Administrator
- Administrator
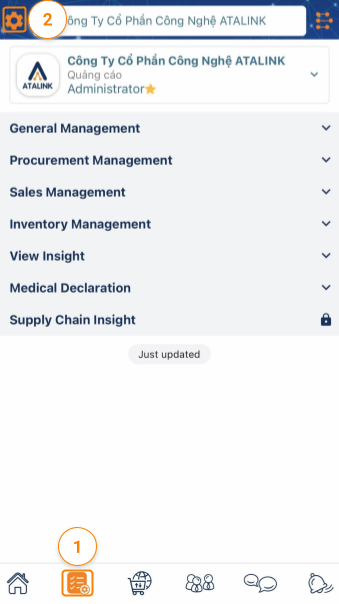
Step 1 : Access My Tasks by one of the following options:
- Option 1 : Tap on the icon
 at the Menu bar
 - Option 2 : On the Home page, swipe to the left
Step 2 : Tap on the icon ![]() at the top left corner
at the top left corner
1. Set up Job Titles
Add Job Titles in the Sales & Marketing section
Step 1: You continue to access the General >tap on Job Titles > Sales & Marketing and lookup if the titles in the company’s sales system are available in the title list from ATALINK or not. Otherwise, please return to the Job Title screen to create a new title.


Step 2: On the Job Titles Screen, tap on + in the right corner of the screen to add a new title

Step 3: Choose Job Title Group and type new Job Titles

Step 4: Tap on Save to finish
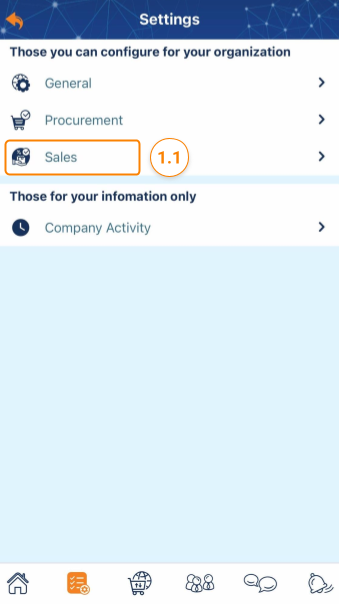
2. Set up Sales Manager Levels
Step 1: You continue to access the Sales Setting > tap on Sales Manager Levels.
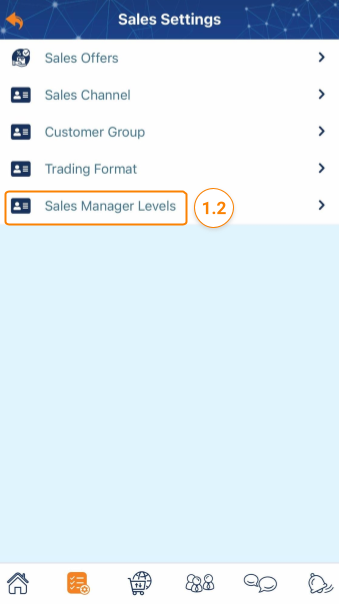
This configuration will help your company build a hierarchy in the company’s sales management team. Depending on the model of each company the hierarchy will be different, ATALINK makes available a standard hierarchy commonly used in companies:
- Level 1: Regional Sales Manager
- Level 2: Area Sales Manager
- Level 3: Sales Supervisor
If this model is not suitable for the operation of your company, you can revise it accordingly:
-
Tap on the icon
 to edit the title of the Sales Manager > Save to finish
 -
Tap on the icon
 to delete this level. If there is a lower level, this one will automatically be upgraded.
 -
Tap on the icon + in the right corner of the screen to add a Sales Manager level (lower level)
