Manage Customers
1. Add Customers
You can add Customers by accessing My Tasks > Sales Management > Customers
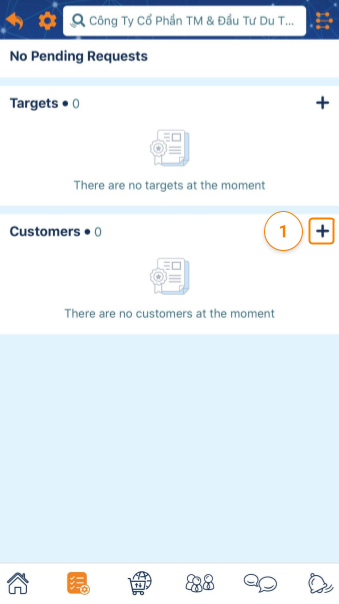
Step 1 : To add customers, Tap on the + icon right in the leads frame
Step 2 : At the Select Company screen:
- Search a customer by Company Name or Tax Code. In addition, ATALINK also provides filters by Locations or Industries to find customers more quickly.
- Tap on the + icon next to a customer to add that customer to your company’s customer list.

Step 3 : Update customer’s information, add Contact Person, Supervisor and choose a suitable Sub-type, Sales Data
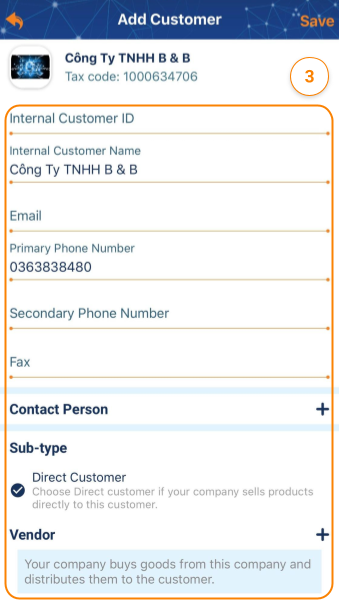
Step 4: Tap on Save to complete
After that, the corresponding Customer will receive a request to confirm the business relationship on ATALINK. You will see the status Pending Confirmation until that Customer accepts your request, the status will be turned into Accepted .
2. Option for Customers
Tap on the … at the top right corner or tap on the customer that you want to edit.
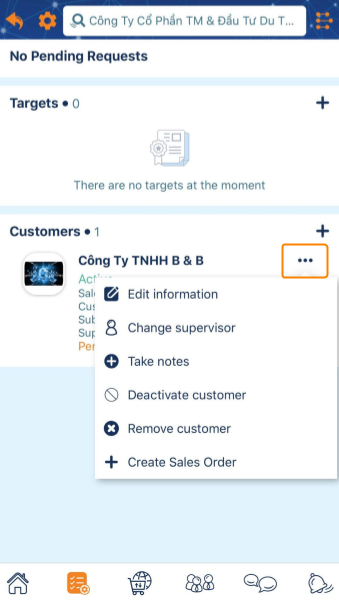
- Edit information : Update the information of customers. After the update is complete, touch Save to finish.
- Change supervisor : Select or change another salesperson/manager to take charge of this customer.
- Add Note / Take notes : Add notes to customers. Tap on the customer > NOTES to view notes created for that customer.
- Deactivate customer : Suspended from a customer who is no longer interacting on your sales lists. This action can be redone by choosing Activate customer
- Remove customer : Remove the company from the customer list. Note: If you have been or are currently having transactions with this customer on the app, you cannot remove it from the customer list.
- Create Sales Orders: Tap on the Create sales orders button with customers, please read this guide to get how to create and manage Sales Orders.
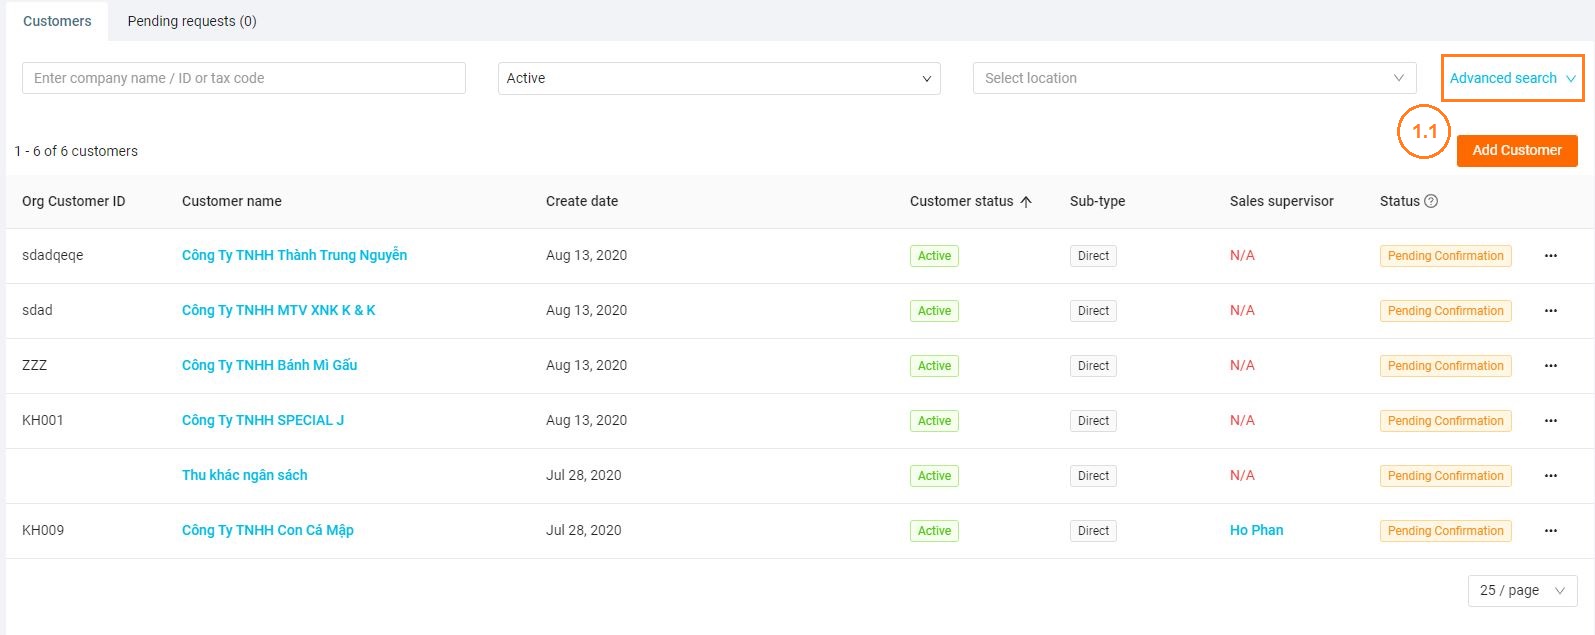
The customer list is displayed according to the following fields:
- Customer ID
- Customer Name
- Customer Status
- Sales Channel
- Sub-type
- Sales supervisor
- Status
1. Add Customers
Step 1: You can add Customers by accessing My Tasks > Sales > Customers
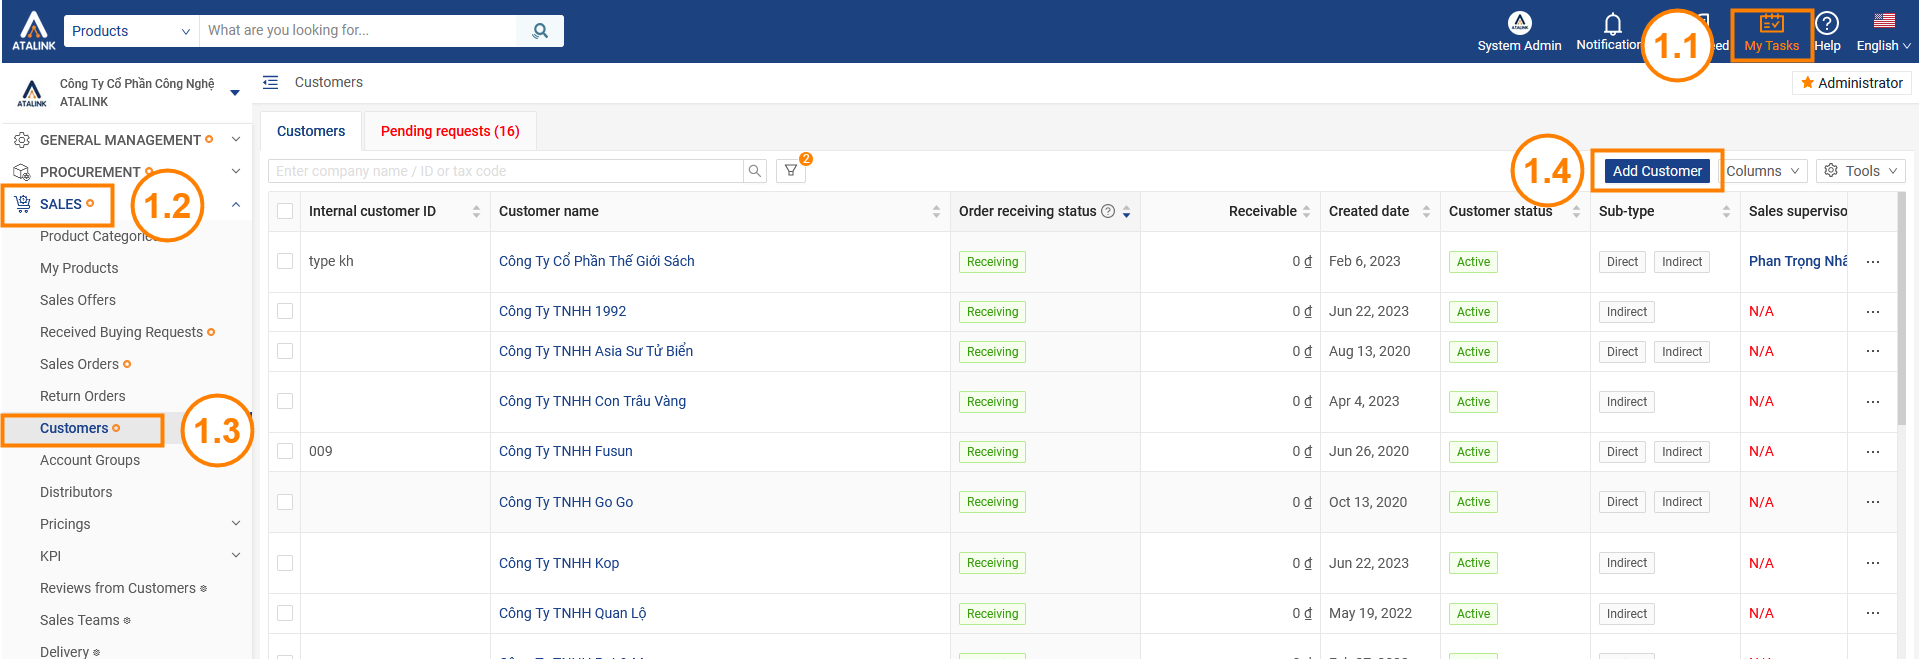
Step 2: At Add Customers screen, You have 2 options:
Select customer: Choose from a list of organizations verified by Atalink
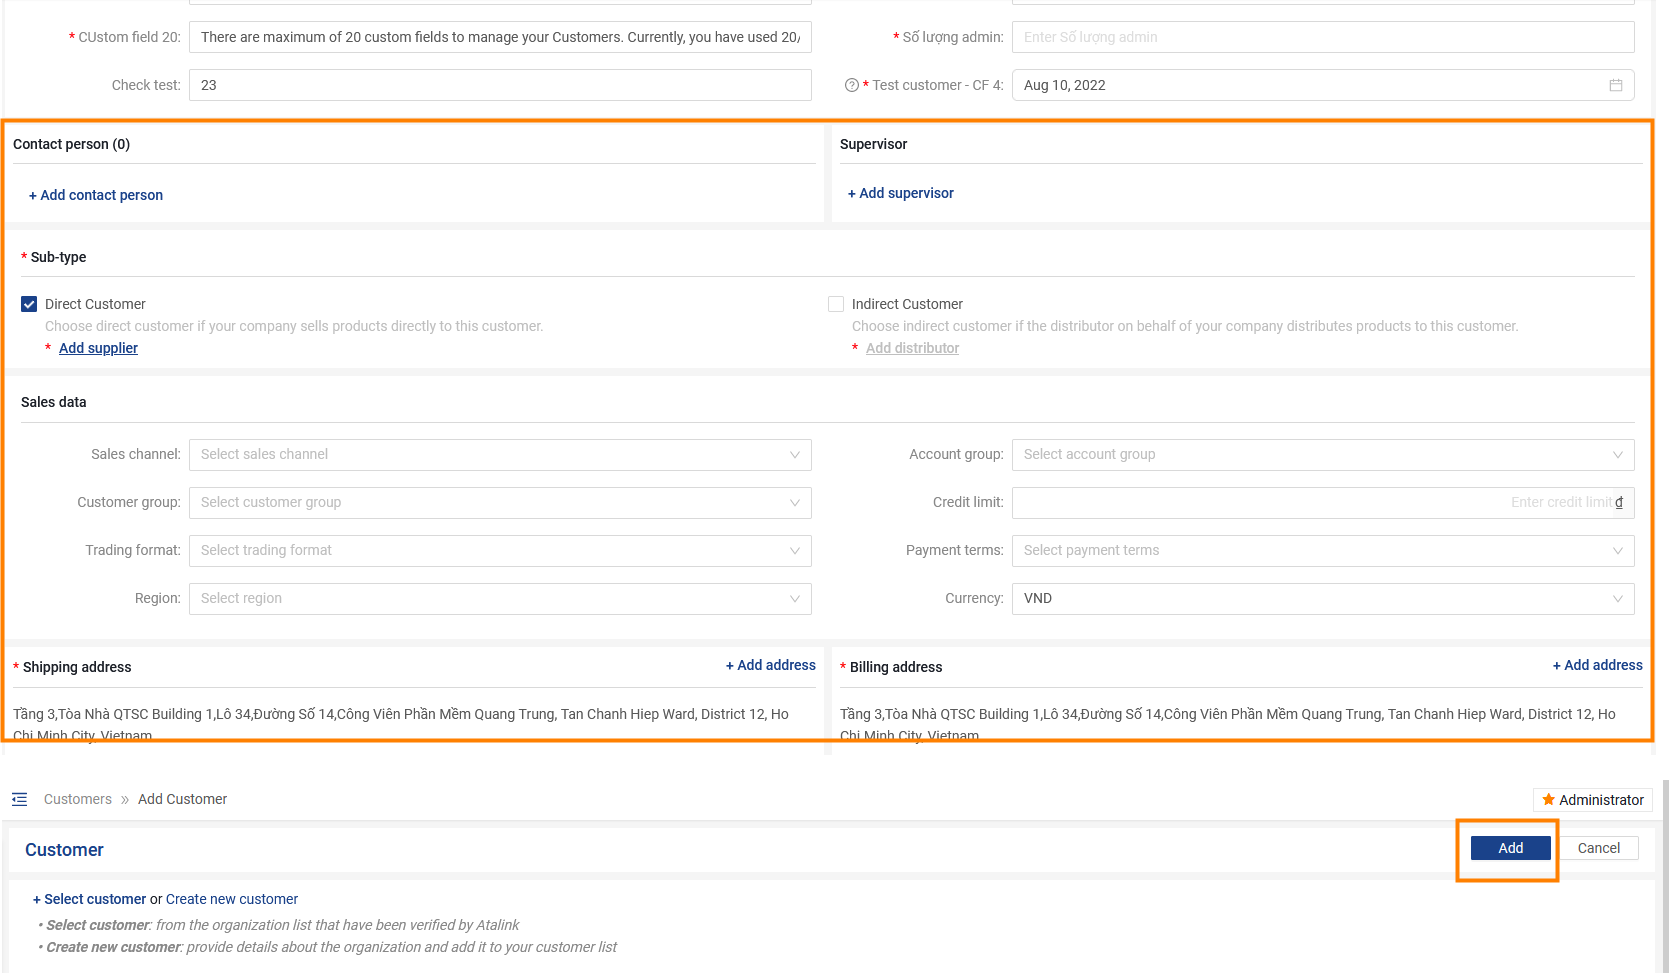
Click + Select customer > Find the customer you want to add (If the list is not available, you can enter the business name or tax code in the search bar)

Update current customer information:
- Contact person
- Supervisor
- Sub-type
- Sales data
- Shipping address
- Billing address
After fully updating the information, click Add to complete the operation of adding customers
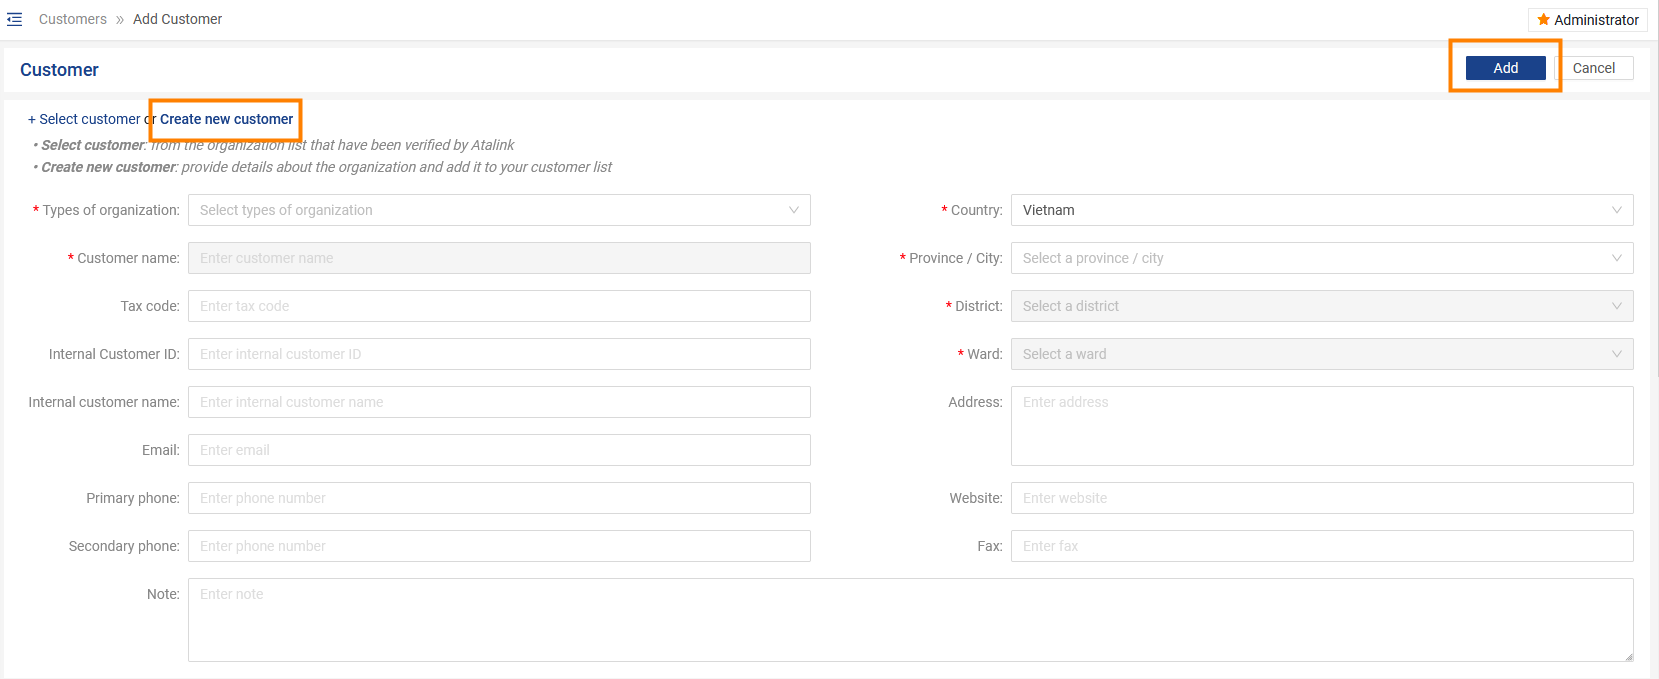
Create new customer: If the business you want to add is not in the Atalink verified business list, you can declare new business information and add it to the customer list
Click on + Create new customer > Fill in all business information > Click Add to finish adding customers
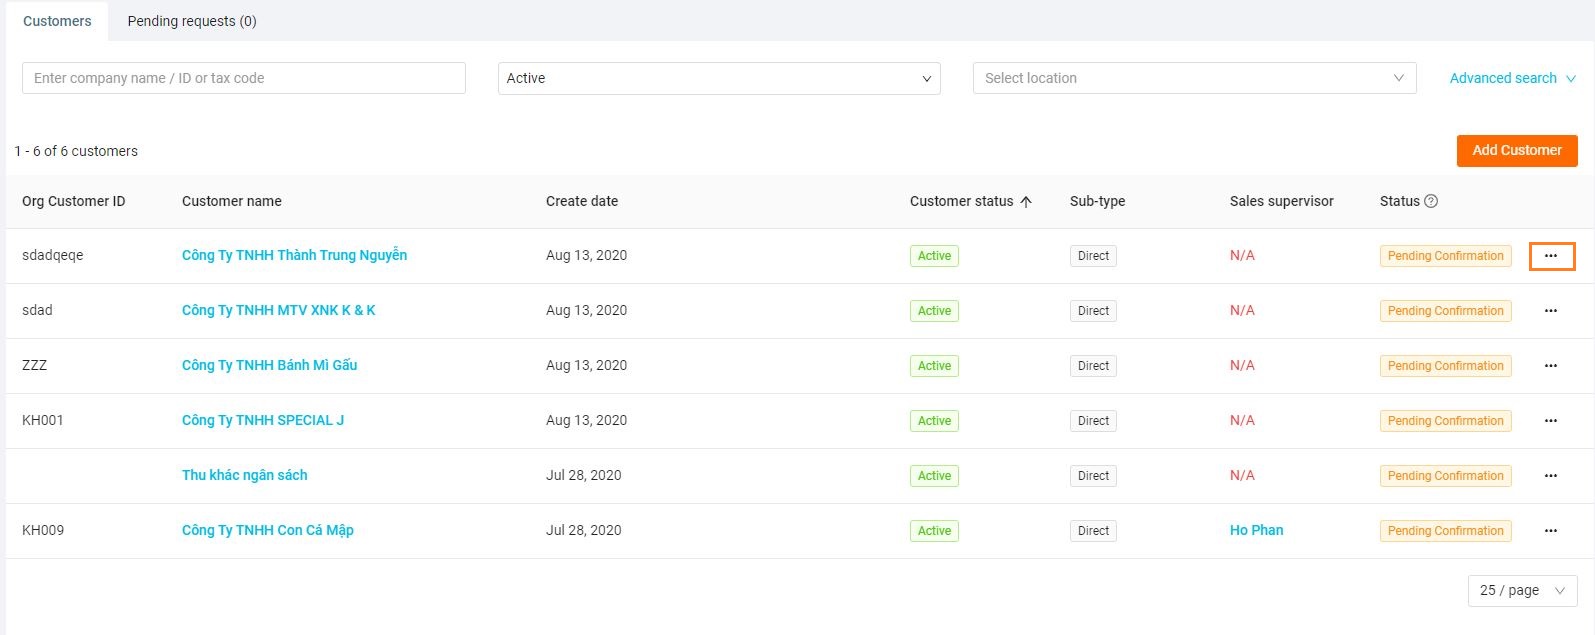
After just adding an existing customer, its current status is Waiting for Authentication, need to wait for the client to Accept the request for you to become a Provider. Then the status between the two parties is Authenticated.
2. Option for Customers
Tap on the … at the top right corner or tap on the customer that you want to edit.
3. Search Customer
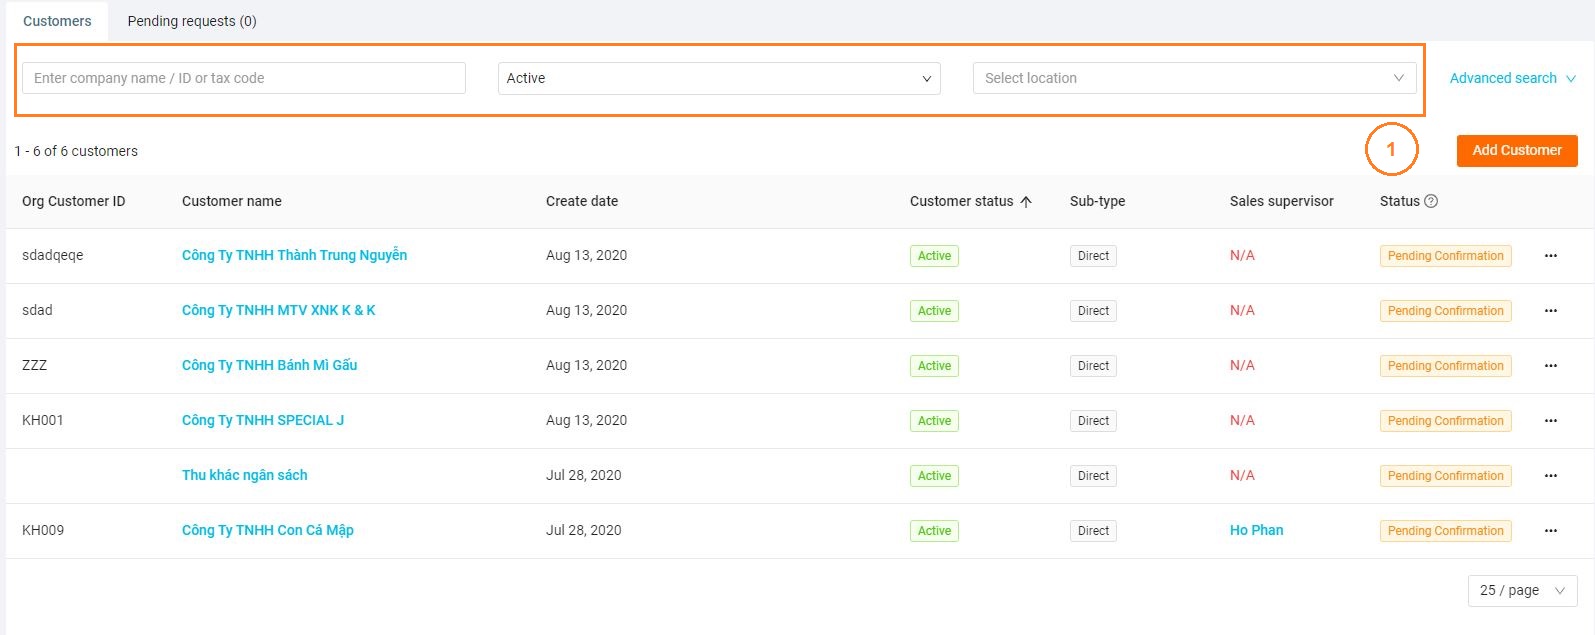
Step 1: Please filter to search customer list
-
Collapse filter
-
Type customer name, customer ID, Tax code
-
Customer status
-
Locations
-
-
Tap on Advanced search to expand filter
-
Type customer name, customer ID, Tax code
-
Sub-type
-
Customer status
-
Authentication Status
-
Locations
-
Sales Channel
-
Customer Group
-
Trading Format
-
Region
-
Supervisor
-
Step 2: Click the Search button to display customer that you need to find

Step 3: Click the Default button to display all customer of the company
Note : For every role, you will manage a different list of customers. If you are
-
A Sales person will view a list of customers group you manage
-
Sales team leader/ Sales Manege will view an entire list of customers of all sales person you manage
-
Boss/ Sales Admin/ Administrator/ Super Administrator will view an entire list of customers of the company


